Beachte, dass du einen aktuellen Browser benötigst, um den Editor zu benutzen (empfohlen werden Firefox oder Chrome).
Nutze den Online-Schnitteditor, um bestimmte Bereiche einer Audiodatei herauszuschneiden und das Ergebnis in einer weiteren Datei zum lizenzfreien Download abzulegen. Beschreibe zudem einen Audiobeitrag in seinen Bestandteilen näher, indem du Bereiche markierst und als „Moderation“, „Interview“, „Live Einstieg", etc. kennzeichnest. Wähle für unterschiedliche Inhalte (z.B. für Musik und Sprache) unterschiedliche Lizenzen aus, um festzulegen, welche Bereiche herausgeschnitten werden sollen und welche verbleiben.
Wenn deine Dateien verwertungspflichtiges Material (v.a. kommerziell erhältliche Musik) enthalten, muss aus rechtlichen Gründen der Download einer Datei eingeschränkt werden, sie darf dann nur im Browser direkt angehört werden. Für User, die nicht Mitglied eines österreichischen Community-Radios sind, darf die Datei dann gar nicht verbreitet werden oder es müssen dazu die Online-Zurverfügungstellungsrechte eingeholt werden.
Die Downloadeinschränkung führt auch dazu, dass Podcasting nicht möglich ist, da die Datei, die solches Material enthält, dann auch im RSS Feed nicht aufscheinen darf.
Auf kommerziellen Plattformen wie Spotify, Apple Podcasts, Google Podcasts, u.a. dürfen die Dateien ebenfalls nicht geteilt werden, da die Nutzungsbedingungen dieser Plattformen dies ausschließen. Es werden dort auch proaktiv Podcasts entfernt, die überhaupt Musik enthalten, um das rechtliche Risiko für die Plattformbetreiber zu minimieren.
Um diesem Problem beizukommen, kannst du entweder Creative Commons-lizenzierte Musik verwenden (deren Lizenz und Autor:in du dann bei jedem Titel angeben musst) oder du kannst den Schnitteditor benutzen, um dieses Material herauszuschneiden und so eine zweite Datei erzeugen, die dann unter CC Lizenz zum Download und zur Verbreitung als Podcast zur Verfügung gestellt werden kann.
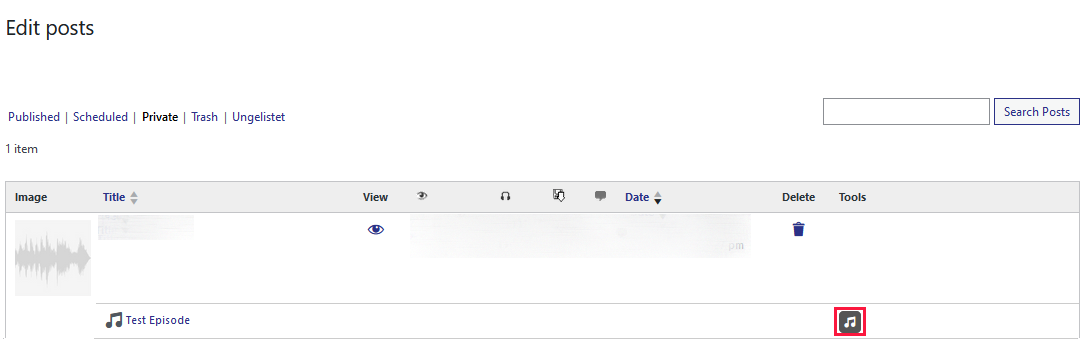
Zum Öffnen des Schnitteditors öffnet man die Seite “Beiträge bearbeiten” und klickt rechts neben dem gewünschten Beitrag auf “Dateien anzeigen”.

Klicke anschließend auf das Musiknoten-Symbol neben der jeweiligen Datei, um den Editor zu starten.
Damit der Editor vollständig geöffnet werden kann, muss die Audiodatei im Hintergrund heruntergeladen werden und die Wellenform von deinem Browser erstellt werden. Damit das schneller geht, wird eine kleinere Vorschauversion geladen. Dies kann je nach Länge der Datei, der Geschwindigkeit deiner Internetverbindung oder deines Computers von einigen Sekunden bis zu einer Minute dauern.
Um den Editor zu schließen, klicke in einen Bereich außerhalb.
Der Editor ist in mehrere Bereiche unterteilt (siehe Abbildung).
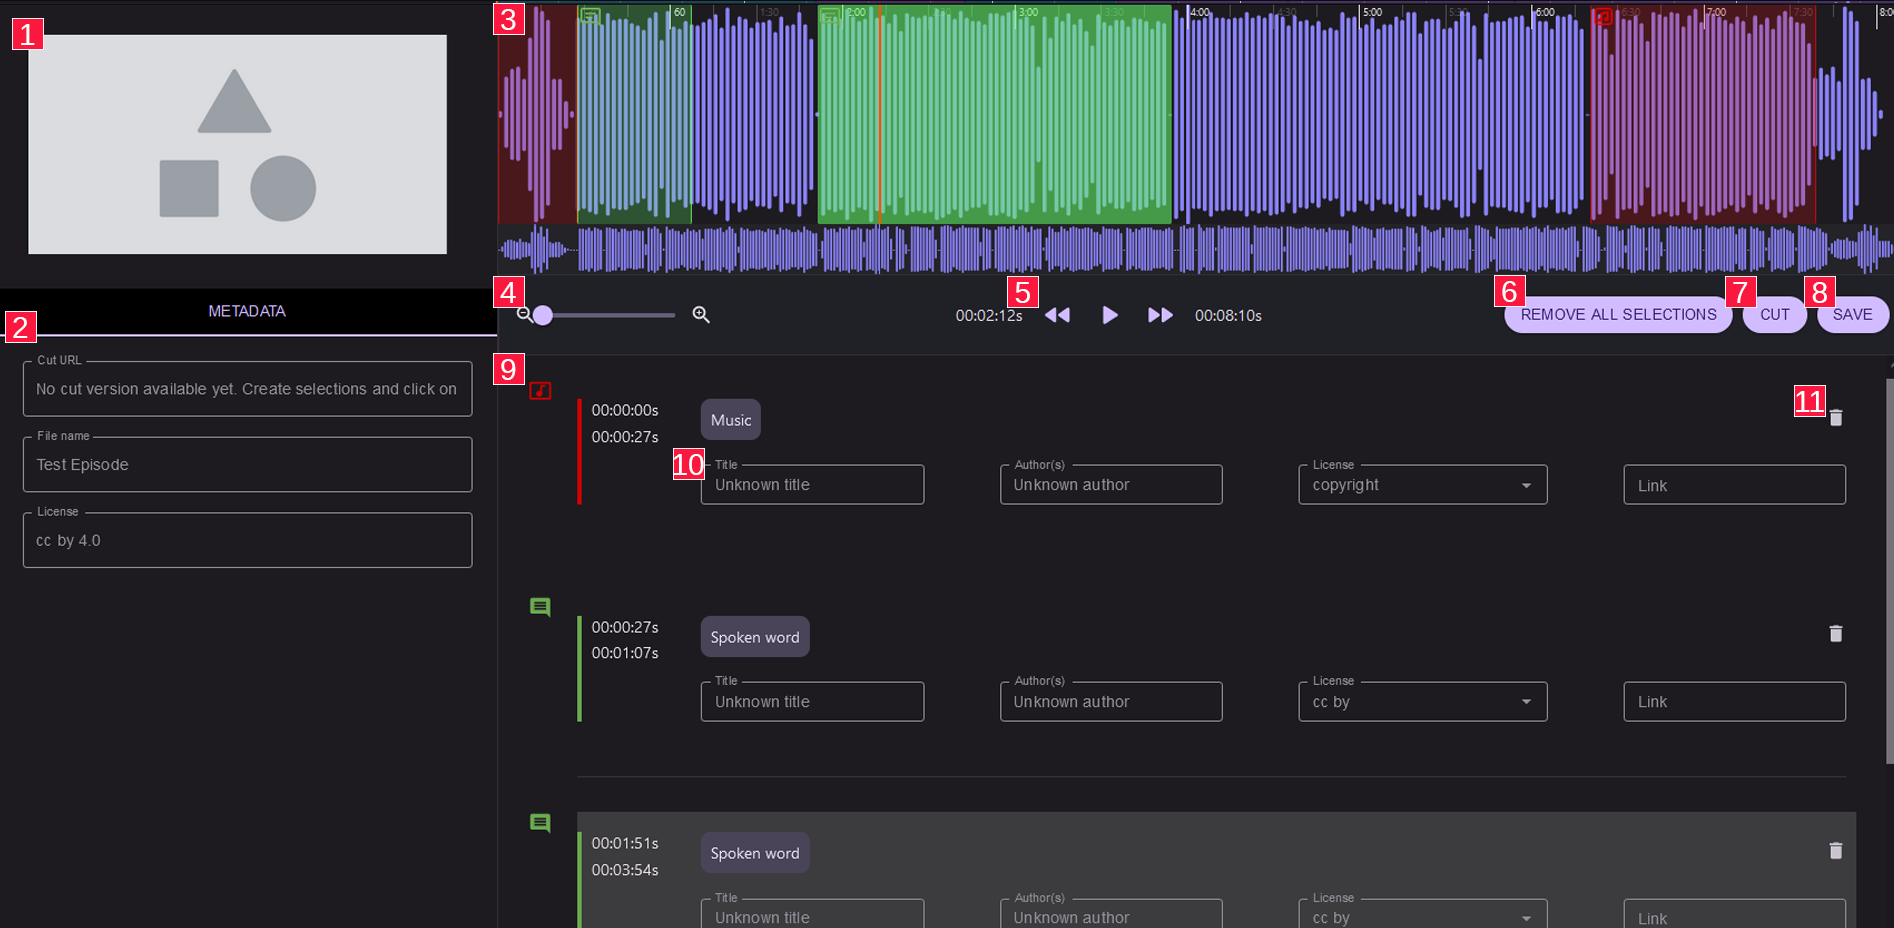
Das Vorschaubild der Audiodatei oder das Video, dessen Audiospur bearbeitet wird. (in Kürze)
Hier werden wichtige Informationen zur Audiodatei angezeigt, wie der Titel, die Lizenz und die URL zur geschnittenen Datei.
Gib einen möglichst aussagekräftigen Titel für die Datei an. Er wird im Player in der Playlist angezeigt.
Die Lizenz bezieht sich entweder auf die Originaldatei, oder, wenn du sie bereits geschnitten hast, auf die Schnittversion, die dann frei herunterladbar und auch wieder veröffentlichbar sein soll, um sie zB. auf weiteren Podcasting-Plattformen zu teilen. Wähle also eine Creative Commons Lizenz (zB. cc by), damit die Datei möglichst frei verbreitet werden darf.
Die Änderungen werden gespeichert, sobald du auf “Speichern” klickst. (8)
Eine visuelle Darstellung der Audiodatei, die es dir ermöglicht, Bereiche zu markieren und zu bearbeiten. Bereits markierte Stellen werden hier farbig dargestellt (Musikbereiche mit rot und Sprache mit grün). Die rote Linie (Cursor) zeigt die derzeitige Abspielstelle in der Audiodatei an. Klicke auf eine Stelle innerhalb der Wellenform, um zu diesem Punkt in der Audiodatei zu springen.
Ermöglicht die Wellenform ausschnittsweise zu vergrößern (zoomen), um feinere Anpassungen vorzunehmen. Ziehe den Regler nach rechts um einen Ausschnitt der Wellenform zu vergrößern und nach ganz links, um sie vollständig zu sehen.
Die untere, kleinere, Wellenform zeigt immer die ganze Datei, sodass du immer zu einem beliebigen Punkt springen kannst, egal welchen Zoomfaktor du gerade eingestellt hast.
Hier befinden sich zwei Zeitanzeigen. Die linke ist die Zeit, die bis zu dem derzeit ausgewählten Zeitpunkt vergangen ist, und die rechte beschreibt die Gesamtlänge der Audiodatei.
Dazwischen sind jeweils ein Rückspul-, Play/Pause- und Vorspul-Knopf. Klicke auf den Rückspul- oder Vorspul-Knopf um jeweils 10 Sekunden in der Audiodatei zurück oder vor zu springen. Klicke auf den mittleren Play/Pause Knopf oder nutze die Leertaste, um die Wiedergabe zu starten oder zu pausieren.
Mit diesem Knopf kannst du alle Markierungen gleichzeitig löschen, um die Datei wieder in den Originalzustand zu versetzen. Du wirst vorher nach einer Bestätigung gefragt.
Klicke auf diesen Knopf um die Metdaten und die Kapitelbeschreibungen zu speichern und den Schnitt-Prozess zu starten (Siehe Kapitel “Schneiden”) und eine zweite Datei zu erstellen, die kein urheberrechtlich geschütztes Material enthält.
Dieser Knopf speichert alle derzeitigen Änderungen, die im Editor getätigt wurden. Wenn du nur speicherst, ohne zu schneiden, werden nur die Metadaten und Markierungsbeschreibungen gespeichert, ohne dass eine zweite Datei erstellt wird. Diese Informationen werden dann später im Player als Kapitelinformationen angezeigt.
Die bereits festgelegten Musikbereiche werden in rot und die Sprachbereiche in grün angezeigt. Zusätzlich zur Farbe wird oben links im Bereich ein Symbol (Musiknote für Musik, Textzeichen für Sprache) zur besseren Erkennung angezeigt. Daneben befinden sich die Start- und Endzeiten des Bereiches.
Hier kannst die Markierung/das Kapitel näher beschreiben:
Gib hier entweder den Titel eines Musikstücks an (z.B. “Eine kleine Nachtmusik”) oder lege einen Titel für dieses Kapitel fest (“Studiogespräch zum Thema Tagespolitik”)
Gib hier entweder den:die Interpret:in des Musikstücks an (z.B. “Madonna”) oder Personen, die in diesem Bereich sprechen.
Achtung: Diese Information ist verpflichtend, wenn du Material nutzt, das unter einer Creative Commons Lizenz steht.
Gib hier eine Lizenz für die Markierung an. Als “copyright” (“Alle Rechte vorbehalten”) gekennzeichnete Markierungen werden später aus der Datei entfernt, sobald du auf “Schneiden” klickst. Wenn du nur speicherst, wird nichts geschnitten.
Gib einen Link zu weiterführenden Informationen für diesen Bereich an.
Klicke hier, um die Markierung zu löschen. Sie wird sowohl aus der Liste als auch aus der Wellenform entfernt.
Durch Klicken und Ziehen mit der Maus erstellst du eine neue Markierung in der Wellenform. Es wird dann nach der Art des Markierung gefragt (Musik oder Sprache). Beim Bestätigen des Dialogs wird der ausgewählte Bereich markiert und ein neuer Eintrag in der Markierungsliste erstellt. Sprache wird standardmäßig als Creative Commons Lizenz “cc by” angelegt, während Musik standardmäßig auf „copyright“ (urheberrechtlich geschützt) gesetzt wird. Das kannst du für jede Markierung später individuell ändern.
In der Wellenformanzeige können die Ränder einer Markierung mit der Maus nach links oder rechts gezogen werden um den Bereich zu vergrößern oder zu verkleinern. In der Markierungsliste kann man die Eigenschaften wie Titel, Autor:innen, Lizenz und Link mit einem Klick ins Feld bearbeiten. Wenn du auf "Lizenz" klickst, kannst du aus einer Reihe vorgegebener Lizenzen wählen.
Auf der rechten Seite kannst du auf das Mülltonnen-Symbol einer Markierung klicken, um diese zu löschen. (11)
Mit diesem Knopf kannst du alle Markierungen gleichzeitig löschen, um die Datei wieder in den Originalzustand zu versetzen. Du wirst vorher nach einer Bestätigung gefragt.
Durch Klicken auf den "Schneiden" -Button startest du den Schnittvorgang.
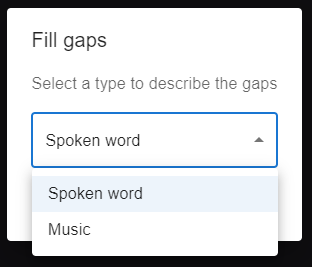
Wenn noch Bereiche vorhanden sind, die nicht markiert wurden, wird nun danach gefragt, ob diese als Musik oder Sprache markiert werden sollen. Nachdem der Dialog bestätigt wurde, werden alle als Musik markierten Teile entfernt, sofern sie als “copyright” (urheberrechtlich geschützt) gekennzeichnet wurden.
Wenn du eine Datei wieder in ihren Originalzustand zurücksetzen möchtest, klicke auf “Alle Markierungen löschen”, anschließend auf “Schneiden” und lasse sie als Sprache markieren. Die Datei bleibt auch dann unverändert, wenn keine Copyright-Markierung enthalten ist.